Squishy Neurons Activity
- Published19 Nov 2018
- Reviewed19 Nov 2018
- Author Emma Lindberg
- Source BrainFacts/SfN
Introduction
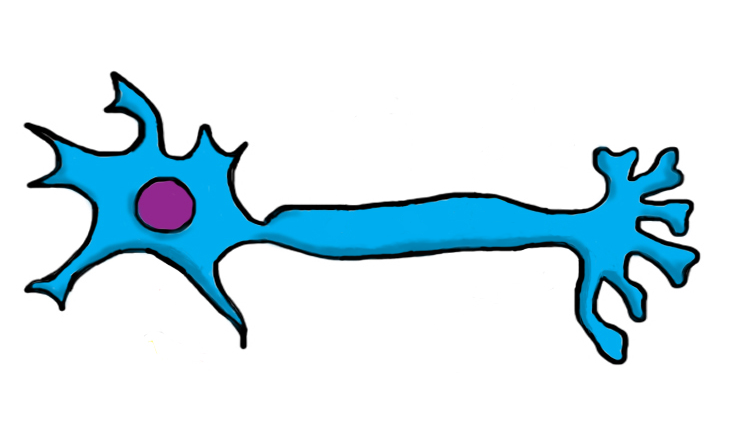
Neurons, the signaling cells of the nervous system, transmit electrical impulses along long fibers called axons. These electrical impulses always flow in the same direction, starting at the cell body and ending at the axon terminals.
Using the Squishy Circuits dough recipe, work with your students to build a model neuron and watch how electricity moves through a brain cell.
Teacher Background
Squishy Circuits has created a variety of templates that students can use to build out simple or elaborate circuits. Following their example, your students can build a functioning neuron with the instructions provided below.
The Squishy Neuron model can be used to show students how electricity travels along neurons in the brain and nervous system. Electrical signals in a neuron travel from the cell body, down the axon, and to the axon terminals. The neuron then releases chemicals called neurotransmitters, which activate receptors in the next neuron to start the electrical signal there.
Materials
- Conductive dough
- Insulating dough
- AA battery holder with metal battery terminals and 4 x AA batteries inside
- 2 LED lights
- Cutting utensil (plastic knife, X-Acto knife)
- Ruler
- Optional: Food coloring
Before you Begin
Follow Squishy Circuits’ instructions to build conductive and insulating dough. One serving of conductive dough yields about three neurons, and one serving of insulting dough makes enough for about 15 neurons.
If you choose to add food coloring to the conductive dough, it is recommended you use a lighter color. Recommended colors include yellow, orange, pink, or light blue. For the purpose of these instructions, the conductive dough will be light blue, and the insulating dough will be yellow.
Divide the conductive dough into three equal parts. Choose one piece of conductive dough to work with and store the rest in an airtight container or plastic bag. If stored properly, the dough can last for a few weeks.
You will only need two marble-sized pieces of insulating dough for each neuron. Remove these two pieces from your larger insulating dough and store the rest.
Step 1:
Remove a small piece of the conductive dough, about the size of a marble, and add food coloring to make it a darker color than the rest of the conductive dough. Once the piece is the desired color, flatten it to form a circle. This will represent the neuron’s cell body.
If you choose not to make the cell body darker, flatten a marble-sized piece of dough to represent the cell body.
Step 2:
Divide the conductive dough into three equal parts. These will be used to form your axon, dendrites, and axon terminals.
Step 3:
To build your axon, roll out one lump of conductive dough into a long, cylindrical piece. Your dough should be about 0.75 inches (2 cm) thick.
Step 4:
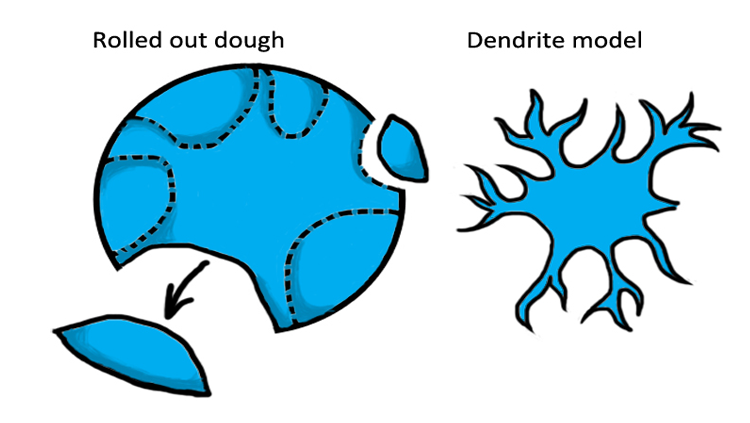
Roll out one of the lumps of conductive dough so that it resembles a circle about 0.5 inches (1.25 cm) thick. From here, cut out the desired dendrites shape (see example image below). Any pieces that are cut away can be reattached as additional dendritic branches or set aside.
Step 5:
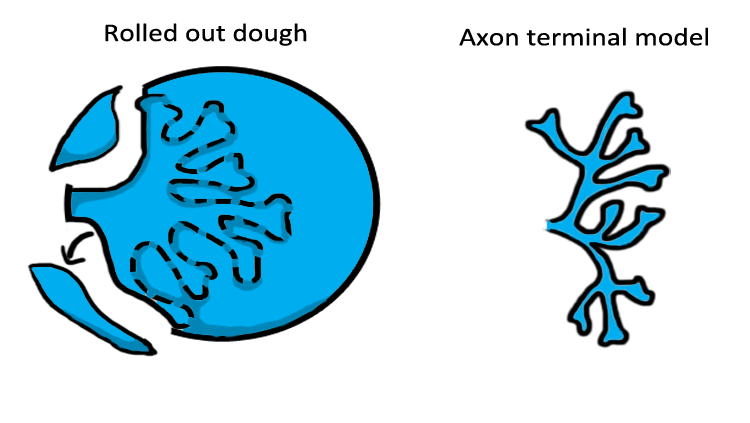
Roll the last lump of conductive dough into a flat circle. From here, cut out the desired axon terminal shape (see example image above). Any pieces that are cut away can be reattached as additional axon terminals or set aside.
Step 6:
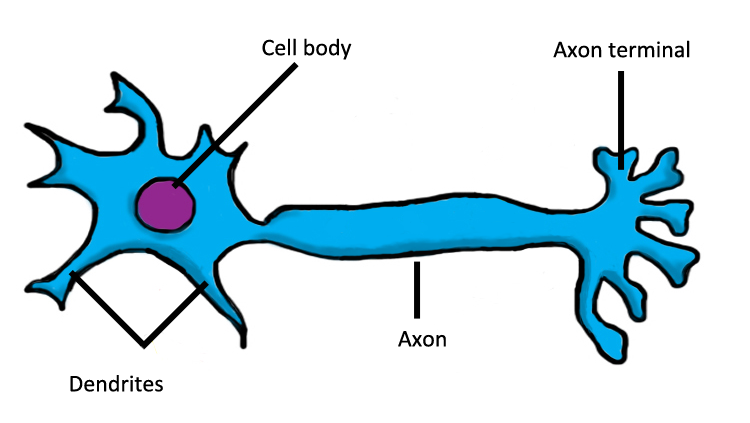
Attach the dendrites to the left of the axon and attach the axon terminal to the right of the axon. Do your best to connect and smooth the dough so there is no seam. Place the cell body on top of the dendrites. Refer to the image below for proper orientation of each piece.
Step 7:
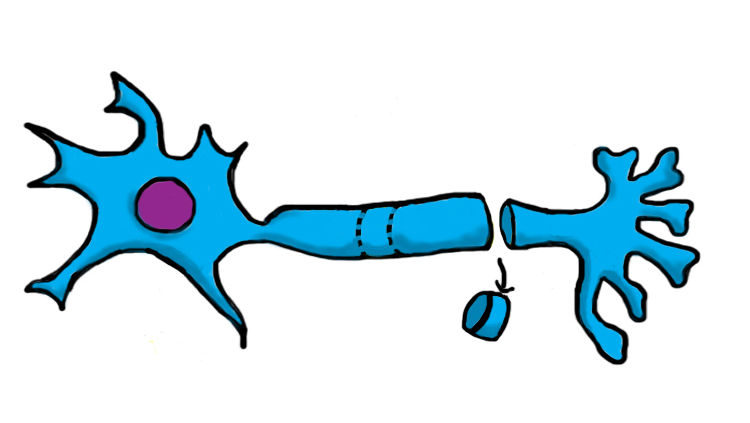
Cut along the axon to remove two pieces of dough each about 0.5 inches (1.25 cm) long. You will be replacing these chunks of conductive dough with the two pieces of insulating dough. The insulating dough will represent myelin.
Step 8:
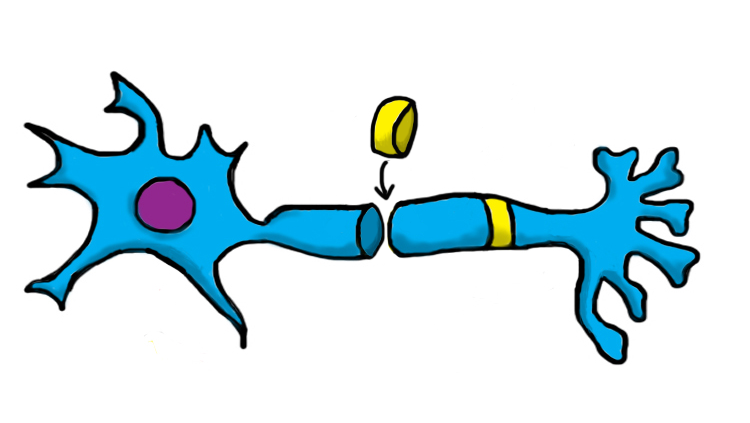
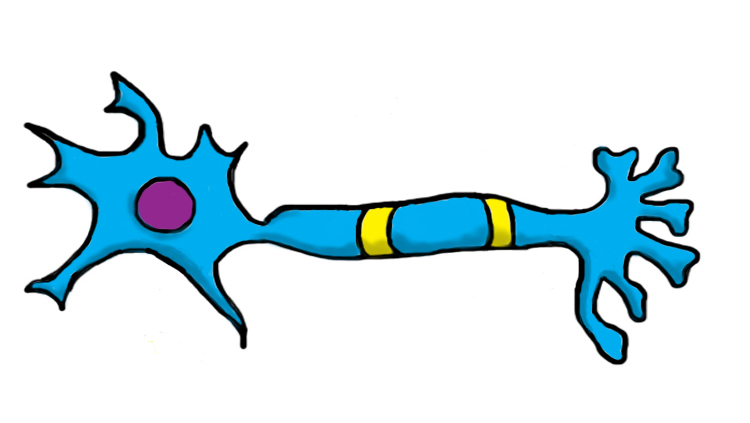
Roll your two pieces of insulating dough into cylinders. Lay one piece of insulating dough in each of the open spaces along the axon. Do your best to connect the two types of dough so they are touching — this will ensure the electricity is flowing through the dough properly. Ensure that the pieces of conductive dough on either side of the myelin are not touching.
Step 9:
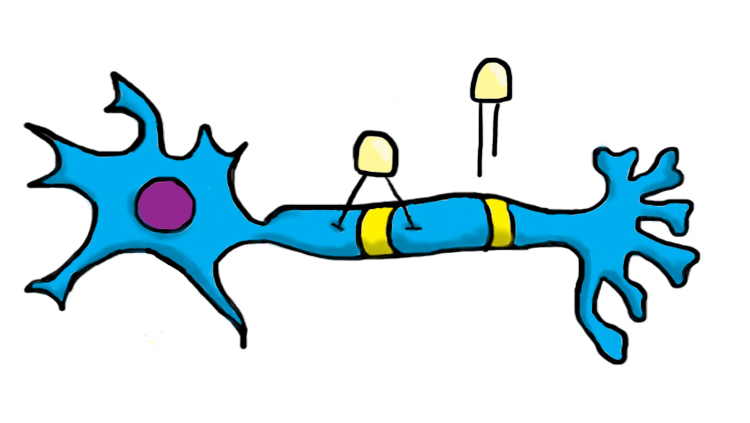
Place the longer leg of an LED light to the left of the myelin closest to the dendrites. Make sure the leg of the LED light is not in the cell body. Place the shorter leg of the first LED light to the right of the myelin in the axon. Make sure these legs do not touch the insulating myelin dough.
Step 10:
With the remaining LED light, place the longer leg in the axon to the left of the second piece of myelin. Make sure the legs of the two LED lights do not touch. Place the shorter leg of the LED light in the axon terminal to the right of the myelin. Make sure the legs do not touch the insulating myelin dough.
Step 11:
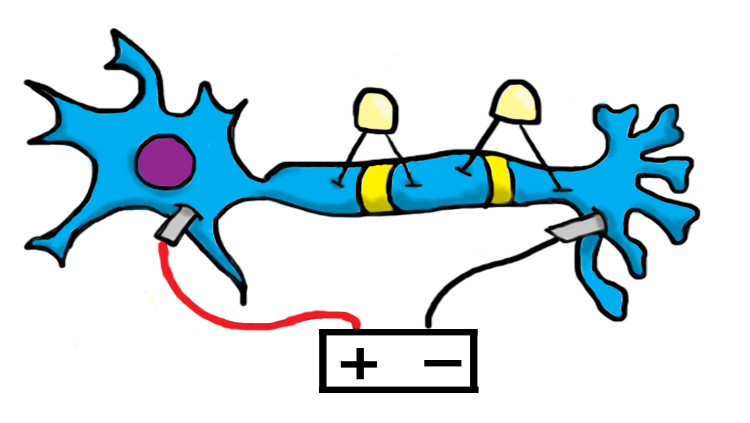
Place the terminal at the end of the red wire of the battery pack into the dendrites and place the terminal of the black wire into the axon terminals. It is important that the positive end (red) is placed in the dendrites because electrical signals only travel in one direction down the neuron — the electrical signal starts in the dendrites and spurs an action potential in the cell body that then travels down to the axon terminals.
Make sure the terminals do not touch the LED lights in the dough.
Wait until the terminals are firmly in the dough before turning the battery pack on.
Step 12:
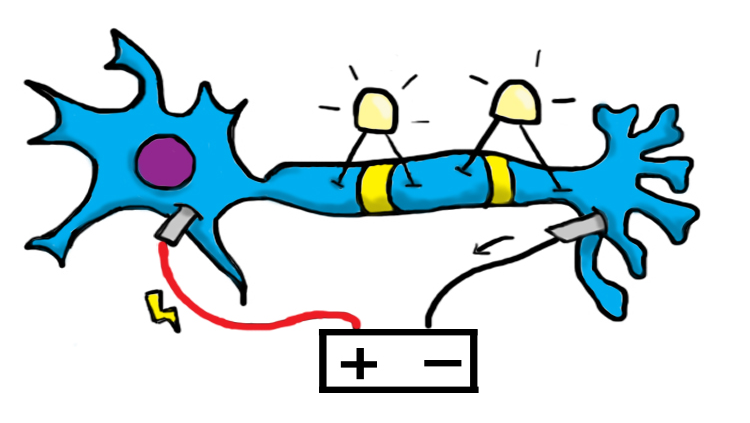
Turn on your battery pack and watch the LED lights glow.
If the neuron doesn’t light up, try the following:
- Check to make sure the batteries in the battery pack are charged.
- Make sure the legs of the LED lights are separated by insulting dough. Double check that no conductive dough is touching the legs of the LED lights.
- Make sure all the dough is touching and that you have no gaps between pieces.
- Make sure the longer leg of each LED is closest to the red wire from the battery pack.
Step 13:
Take a moment to point out the direction in which the electrical signal travels and the two places where the lights appear on the neuron. Electrical signals in a neuron start in the dendrites, triggering an action potential in the cell body that travels down the axon to the axon terminals. The signals do not travel in the opposite direction.
Electrical signals do not go into the myelin. Myelin, a fatty substance that wraps around nerve fibers and insulates them, accelerates the transmission of electrical signals along the axon.
CONTENT PROVIDED BY
BrainFacts/SfN
Also In For the Classroom
Trending
Popular articles on BrainFacts.org


